 Save to Pinterest
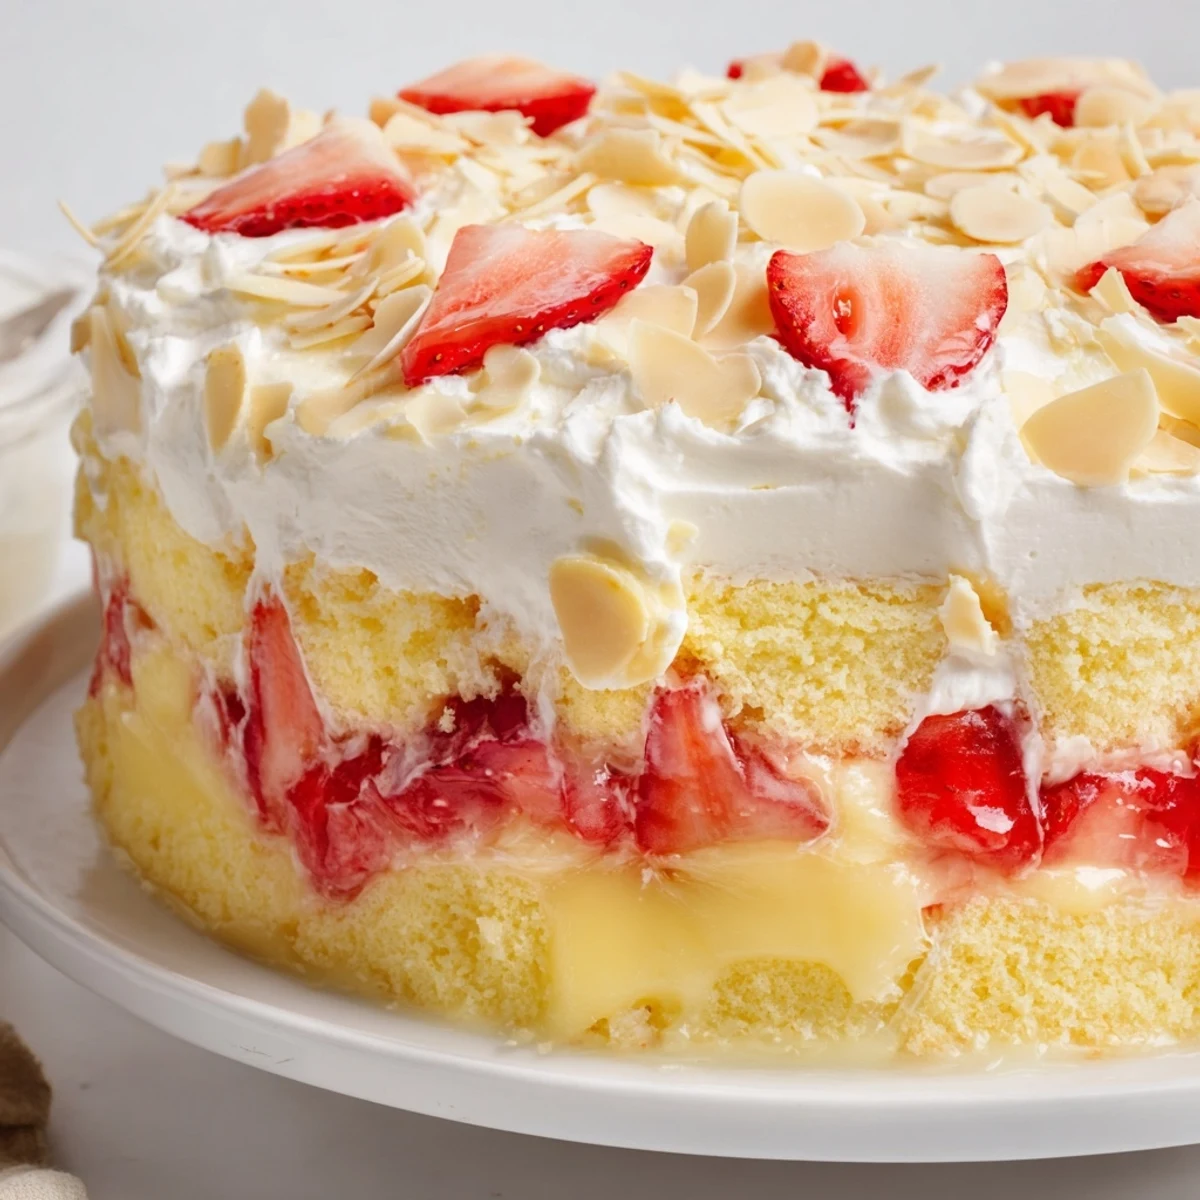
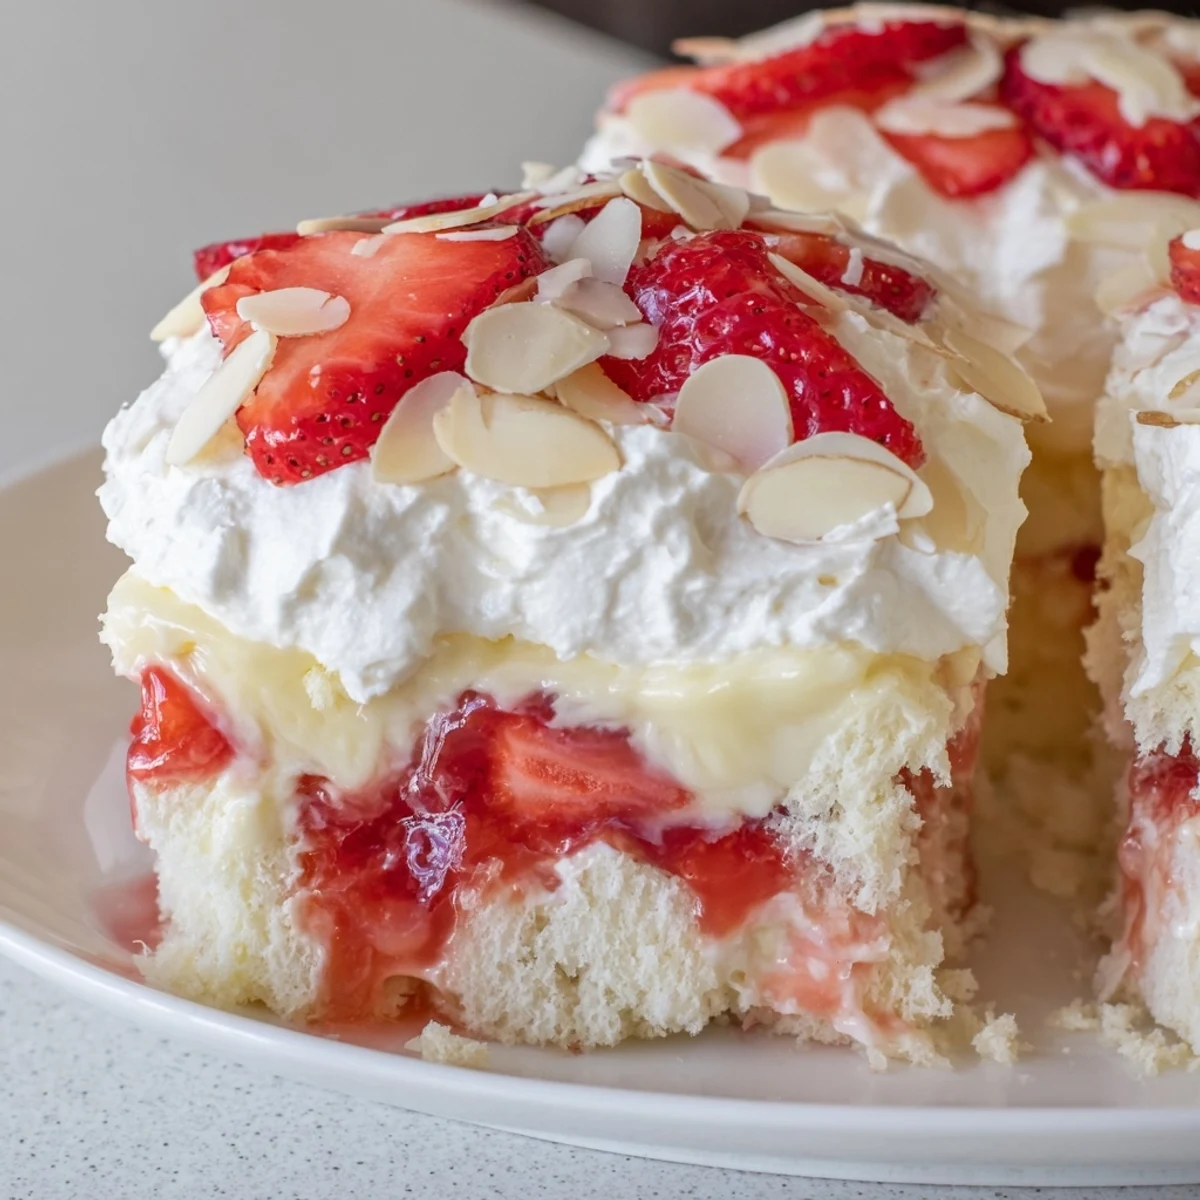
 This luscious dessert combines light angel food cake cubes with sweet strawberry filling, layered beneath creamy vanilla pudding. Whipped topping and optional almonds add texture and flavor. Prepared easily without baking and chilled for hours, it offers a refreshing treat ideal for warm days and gatherings. Variations include raspberry or cherry fillings and lighter dairy options, with fresh garnishes enhancing its freshness. Perfectly balanced and visually appealing, it brings a delightful sweetness to any occasion.
The first time I brought this to a Fourth of July party, my friend Sarah actually chased me around the backyard demanding the recipe. People tend to get surprisingly passionate about layered desserts in the summer heat.
My grandmother used to make something similar but with boxed ingredients from the 1980s, and I have vivid memories of her kitchen smelling like artificial strawberry everything. This version feels like a gentle, modern upgrade that still captures that same nostalgic joy of something sweet and cold on a hot day.
Ingredients
- Angel food cake: I have learned through slightly disastrous experimentation that a store bought cake actually works better here than homemade, the texture is more uniform and absorbs the strawberry filling perfectly
- Strawberry pie filling: Look for the kind with visible strawberry chunks, they make such a difference in the final texture and eating experience
- Cold milk: Temperature matters here, cold milk helps the pudding set up properly and prevents that slightly grainy texture that happens when everything is too warm
- Sour cream: This is the secret ingredient that adds this beautiful tangy depth, do not substitute with plain yogurt, it is not the same thing
- Whipped topping: Let it thaw completely in the refrigerator rather than on the counter, frozen pockets in an otherwise smooth dessert are such a sad surprise
Instructions
- Build the foundation:
- Layer half your angel food cubes in the bottom of your dish, then spoon half the strawberry filling over them, I like to use the back of my spoon to gently press the cubes down so they really soak up all that lovely juice
- Repeat the layers:
- Add the remaining cake cubes followed by the rest of the strawberry filling, you want those beautiful ruby red pockets running through the whole dessert
- Create the cream layer:
- Whisk your cold milk and pudding mix for a full two minutes until it is noticeably thick, then fold in the sour cream and vanilla until everything is completely smooth and no white streaks remain
- Spread it all together:
- Gently spread that creamy mixture over your strawberry layers, try to work quickly and smoothly so you do not disturb the beautiful layers underneath
- Add the finishing touches:
- Top with the whipped topping using light, sweeping motions, then scatter those sliced almonds across the surface for this lovely crunch against all the soft creaminess
- Let it rest:
- Cover tightly and refrigerate for at least two hours, though overnight is even better because the flavors really need that time to get properly acquainted
 Save to Pinterest
 Last summer, my daughter helped me make this for her birthday instead of a traditional cake, and watching her carefully layer each ingredient with such serious concentration was one of those quiet kitchen moments that stuck with me longer than the actual celebration.
Making It Your Own
Raspberry and cherry pie filling both work beautifully here, and I have even experimented with a mixed berry version that became quite requested among my neighbors. The key is maintaining that balance between sweet fruit and tangy cream.
Getting The Texture Right
The most common mistake I see is not letting the pudding thicken enough before spreading, which leads to this disappointing separation where the cream slides into the fruit layer. Trust the two minutes of whisking, your future self will thank you.
Serving Suggestions
This dessert really does need that chill time to properly set, so plan accordingly. The slight crunch from toasted almonds against the soft creamy layers is one of those textural contrasts that makes people ask what is in this.
- Serve it in clear glass bowls so everyone can see those beautiful layers
- A few fresh mint leaves on top make it look fancy with zero extra effort
- It actually tastes even better on day two, if you manage to have any leftovers
 Save to Pinterest
 Every time I serve this, someone inevitably asks for the recipe, which I suppose is the highest compliment a home cook can receive.
Recipe FAQs
- → Can I use a different fruit filling?
-
Yes, raspberry or cherry pie fillings can be substituted to vary the flavor while maintaining the dessert’s texture.
- → How long should the dessert chill before serving?
-
Chilling for at least 2 hours is recommended to allow the layers to set and flavors to meld properly.
- → Is it possible to make a lighter version?
-
Use fat-free pudding and light whipped topping to reduce fat content while keeping the creamy texture intact.
- → What is the best way to garnish this dish?
-
Fresh strawberry slices, sliced almonds, or mint leaves add appealing visual and flavor accents.
- → What tools are needed to prepare this dessert?
-
A large trifle or glass baking dish, mixing bowls, whisk, spatula, knife, and cutting board are essential for assembling the layers.