 Save to Pinterest
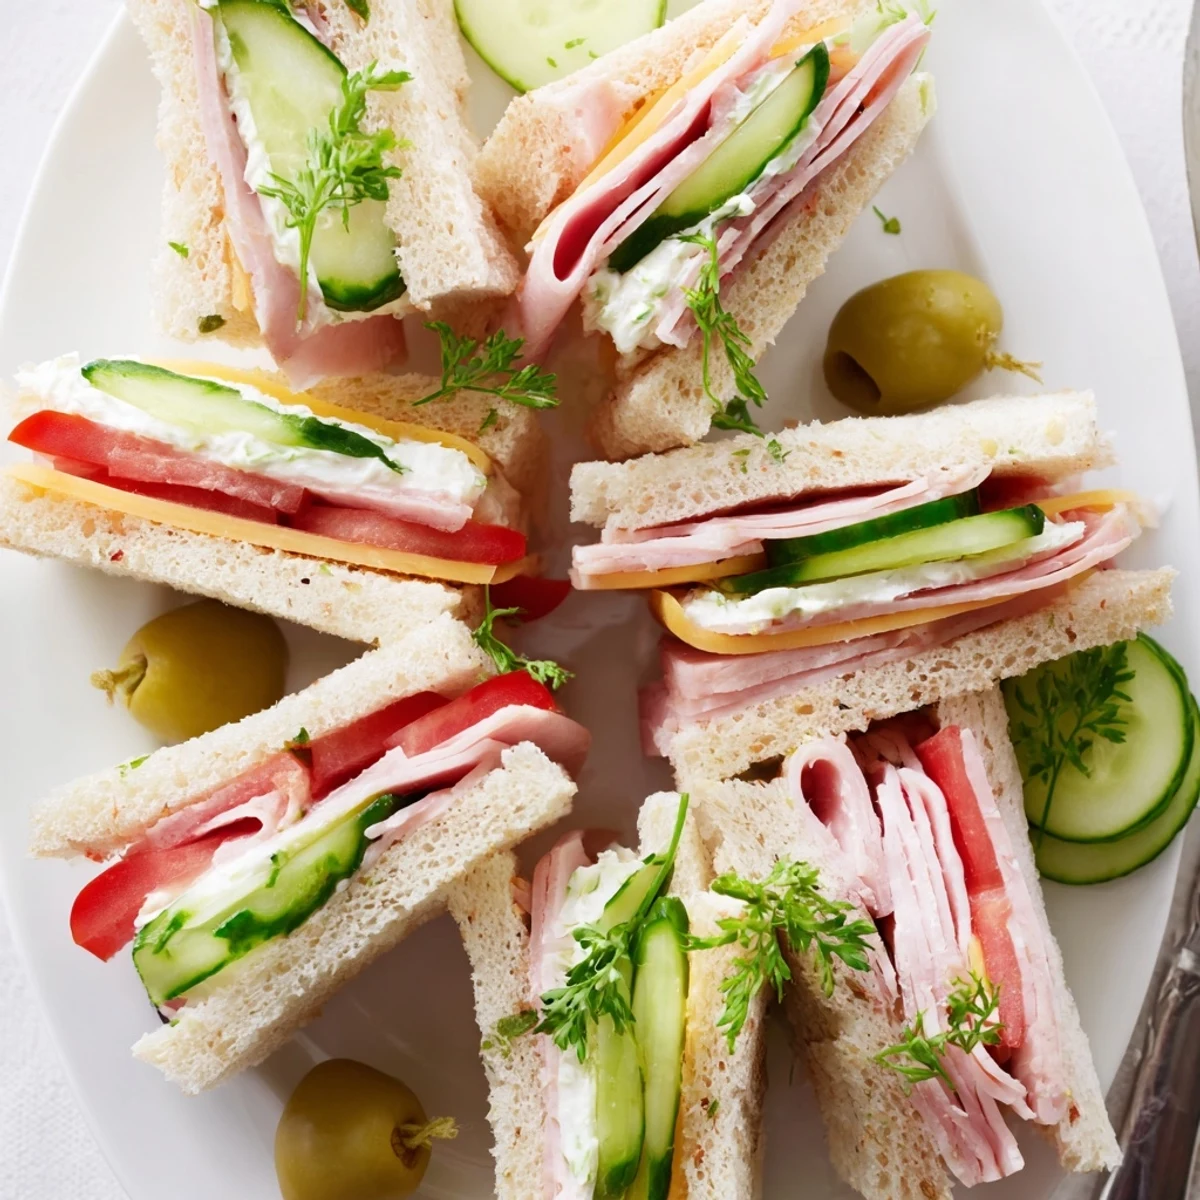
 These mini sandwiches are built on soft sandwich bread spread with mayonnaise or softened cream cheese, then layered with cheddar, cured meat or fresh veg. Press gently, trim crusts if desired, and cut each sandwich into quarters for neat bite-sized portions. Arrange on a platter and garnish with herbs, pickles, or olives. Chill briefly under a damp towel if making ahead.
There’s something oddly satisfying about hearing the gentle clatter of sandwiches being cut on a wooden board—especially when I’m making mini sandwiches for a gang of friends coming over. It’s usually a rush of laughter and clumsy reach for the cream cheese, and the variety of fillings keeps the mood light and playful. The whole kitchen tingles with anticipation, and somehow, everyone seems to gravitate toward the platter even before I’m done. These little bites always surprise me with how quickly they vanish.
One Saturday, my cousin dropped by out of the blue with her two kids, and I started assembling these mini sandwiches with whatever I could find in the fridge. Cucumber, cheese, and even a stray roasted pepper made its way in. The kids took turns stacking their favorites, and I found myself laughing at their miniature masterpieces.
Ingredients
- Bread: Choose soft, fresh sandwich bread since it holds the fillings best and it’s easier to trim; mixing white and wheat adds fun color.
- Mayonnaise: Spreading just a thin layer inside each sandwich keeps things creamy and prevents the bread from drying out.
- Cream Cheese: Make sure it’s softened to avoid tearing the bread—a tip I learned after a few messy tries.
- Cheddar Cheese: Slices are ideal because they tuck neatly into mini formats and deliver tangy richness in every bite.
- Ham or Turkey (optional): Pick your favorite, or skip for vegetarian; using thin slices makes for neater stacking.
- Cucumber: A sharp knife gives the cleanest, crisp slices that don’t slip and slide.
- Tomato: Go with the ripest you can find, patted dry so the bread stays perky and not soggy.
- Lettuce: Romaine and butter lettuce work great, just don’t skip drying to keep sandwiches crisp.
- Salt and Pepper: Brightens up the veggies and ties all the flavors together—I always season right after layering.
- Fresh Herbs (optional): A sprinkling of chives or dill adds color and a pop of flavor if you want to get fancy.
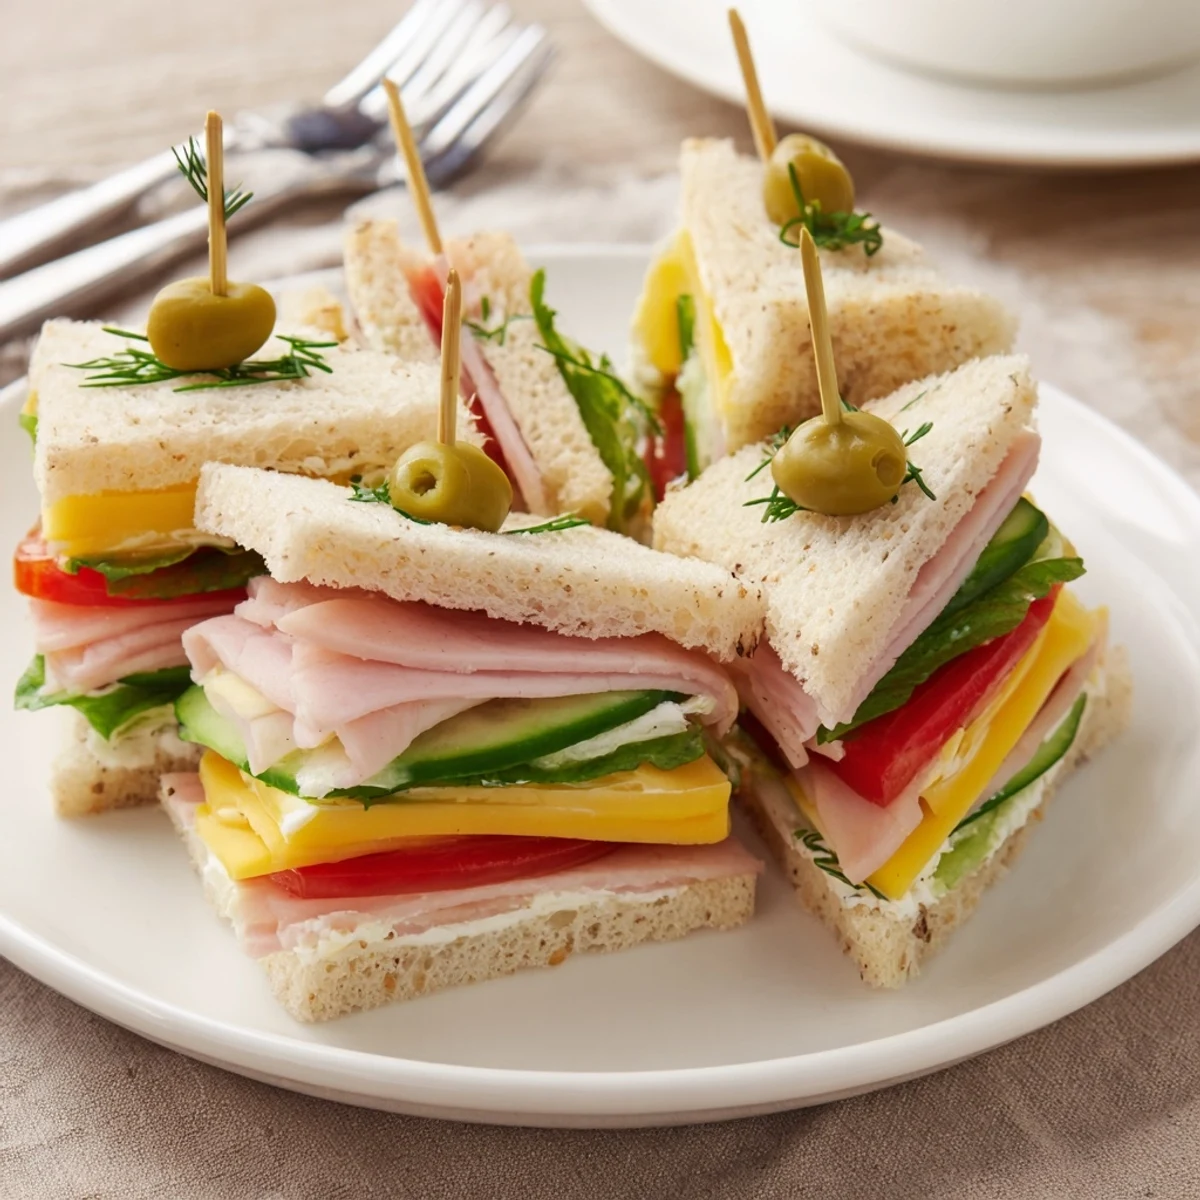
- Pickles or Olives (optional): Spear one onto the top with a toothpick for extra flavor and a pretty party look.
Instructions
- Set up your sandwich station:
- Gather your bread, fillings, and a clear workspace for easy assembly—this is half the fun if you’ve got kitchen helpers nearby.
- Spread with love:
- Evenly smear mayonnaise or cream cheese onto each slice, letting the smoothness glide under your spreading knife.
- Pick your layers:
- On some bread, stack cheddar and ham or turkey; on others, layer crisp cucumber, tomato, and lettuce, seasoning gently with salt and pepper.
- Sandwich and press:
- Top each with another bread slice, then gently press to help them hold shape—clean hands work best for this step.
- Trim and portion:
- Carefully slice away crusts for tidy edges, then cut each sandwich into quarters, whether you fancy triangles or squares.
- Arrange and garnish:
- Lay the finished minis onto a platter, dot with herbs, or perch pickles and olives on top for a festive touch—serve right away, or cover and chill for later.
 Save to Pinterest
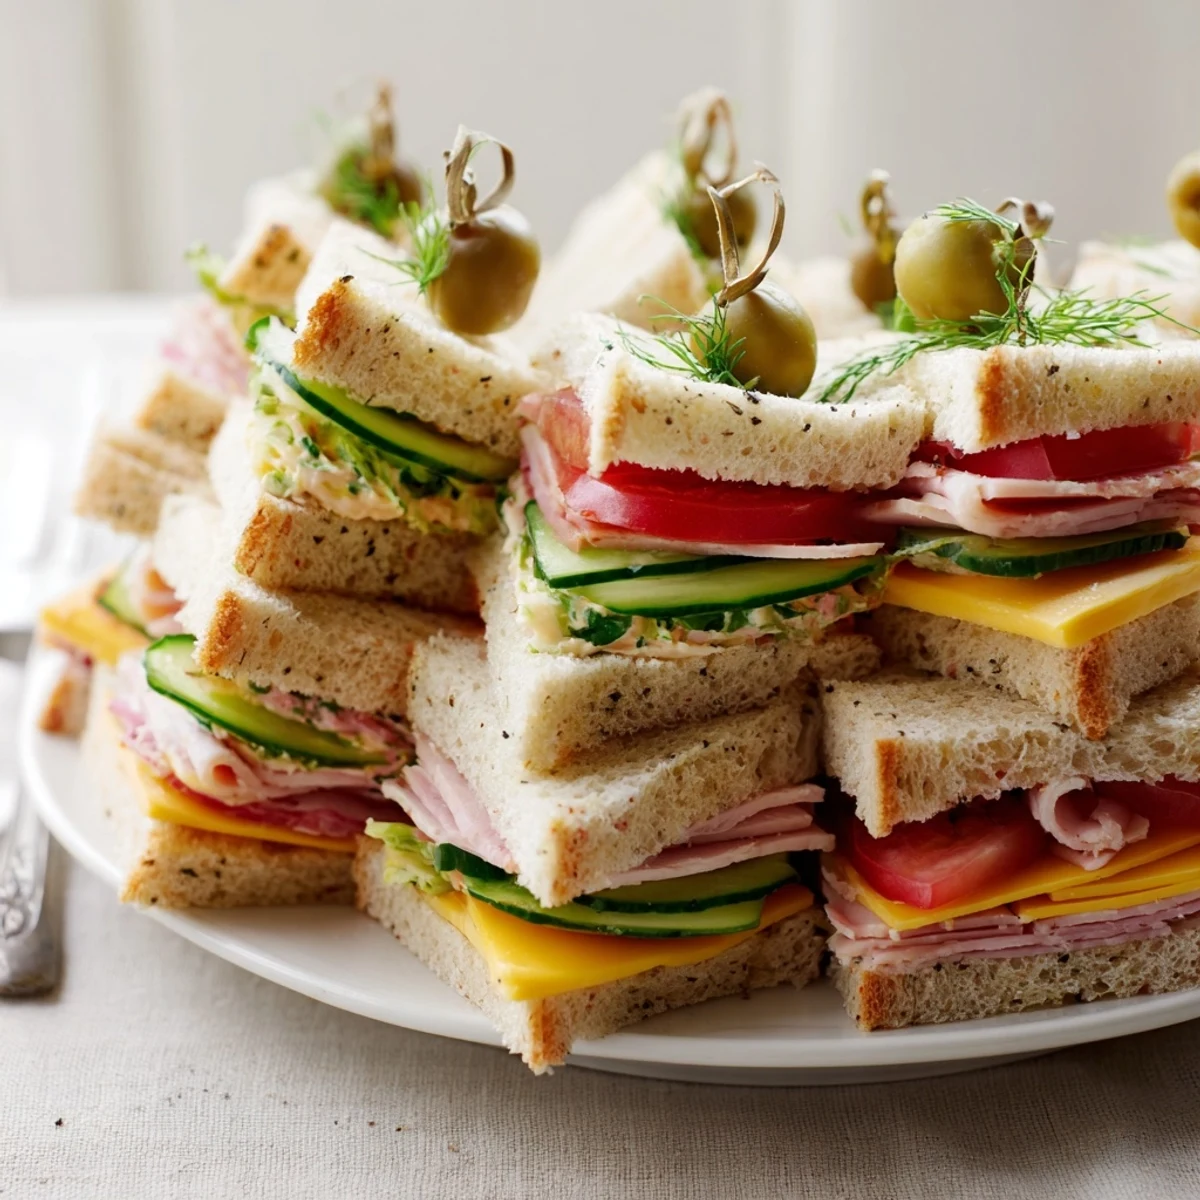
 Handing a plate of these crispy-edged sandwiches to my neighbor on moving day, her smile said more than any thank you could—sometimes the simple things brighten up even the most exhausting afternoons.
How to Mix and Match Fillings
Don’t hold back on inventing new combinations—leftover roasted veggies, a swipe of pesto, or even sliced boiled eggs find a happy home here. It’s always fun to let everyone assemble their own so you end up with a platter as unique as your crowd. You’re just as likely to discover a new favorite while improvising as you are from following any list.
Getting That Perfect Mini Shape
Sharp knives make clean edges, but chilling the sandwiches for about 10 minutes before cutting works wonders, too. Trimming the crusts isn’t strictly necessary, but it does feel a little bit like an act of care. My go-to is creating little triangles that somehow vanish faster than the squares.
Making Ahead Without Sacrificing Freshness
If you want to prep in advance, cover the sandwiches with a very slightly damp paper towel and wrap the tray—it prevents the bread from drying, but don’t let it get soggy. Fresh herbs and garnishes are best added right before serving so they stay bright. Cutting them too early may dull flavors but a last gentle press helps keep things together.
- Plan your fillings and set them out first.
- Don’t skip patting vegetables dry with a paper towel.
- Try to serve within a few hours for the best results.
 Save to Pinterest
 Mini sandwiches don’t just fill a plate—they bring people closer, one cheerful, bite-sized piece at a time. Make a batch and you’ll see: the smiles arrive before the platter’s even empty.
Recipe FAQs
- → What breads work best for mini sandwiches?
-
Soft sandwich breads like white, whole wheat, or multigrain provide a tender bite; for visual contrast try rye or pumpernickel. Thin-sliced loaves make uniform layers and trim neatly.
- → How can I keep fillings from making the bread soggy?
-
Spread a thin barrier of mayonnaise or softened cream cheese directly on the bread to protect it. Slice watery vegetables thinly and pat them dry; place lettuce between drier ingredients and spreads.
- → What are quick vegetarian filling ideas?
-
Use cream cheese with chopped herbs, sliced cheddar with cucumber and tomato, or roasted vegetables with a smear of hummus. Add fresh herbs like chives or dill for brightness.
- → How should I prepare sandwiches ahead of time?
-
Assemble, press lightly, trim, and cut into quarters. Cover with a damp paper towel and plastic wrap or store in an airtight container in the fridge for a few hours to maintain moisture and texture.
- → What’s the best way to cut and present them?
-
Trim crusts if desired for a cleaner look, then cut each sandwich into quarters as squares or triangles. Arrange on a platter and finish with chopped herbs, small pickles, or olives on toothpicks.
- → Can I swap the deli meat for other proteins?
-
Yes—smoked salmon, egg salad, grilled chicken, or shredded rotisserie chicken work well. Balance flavors with complementary spreads and seasonings to keep bites harmonious.