 Save to Pinterest
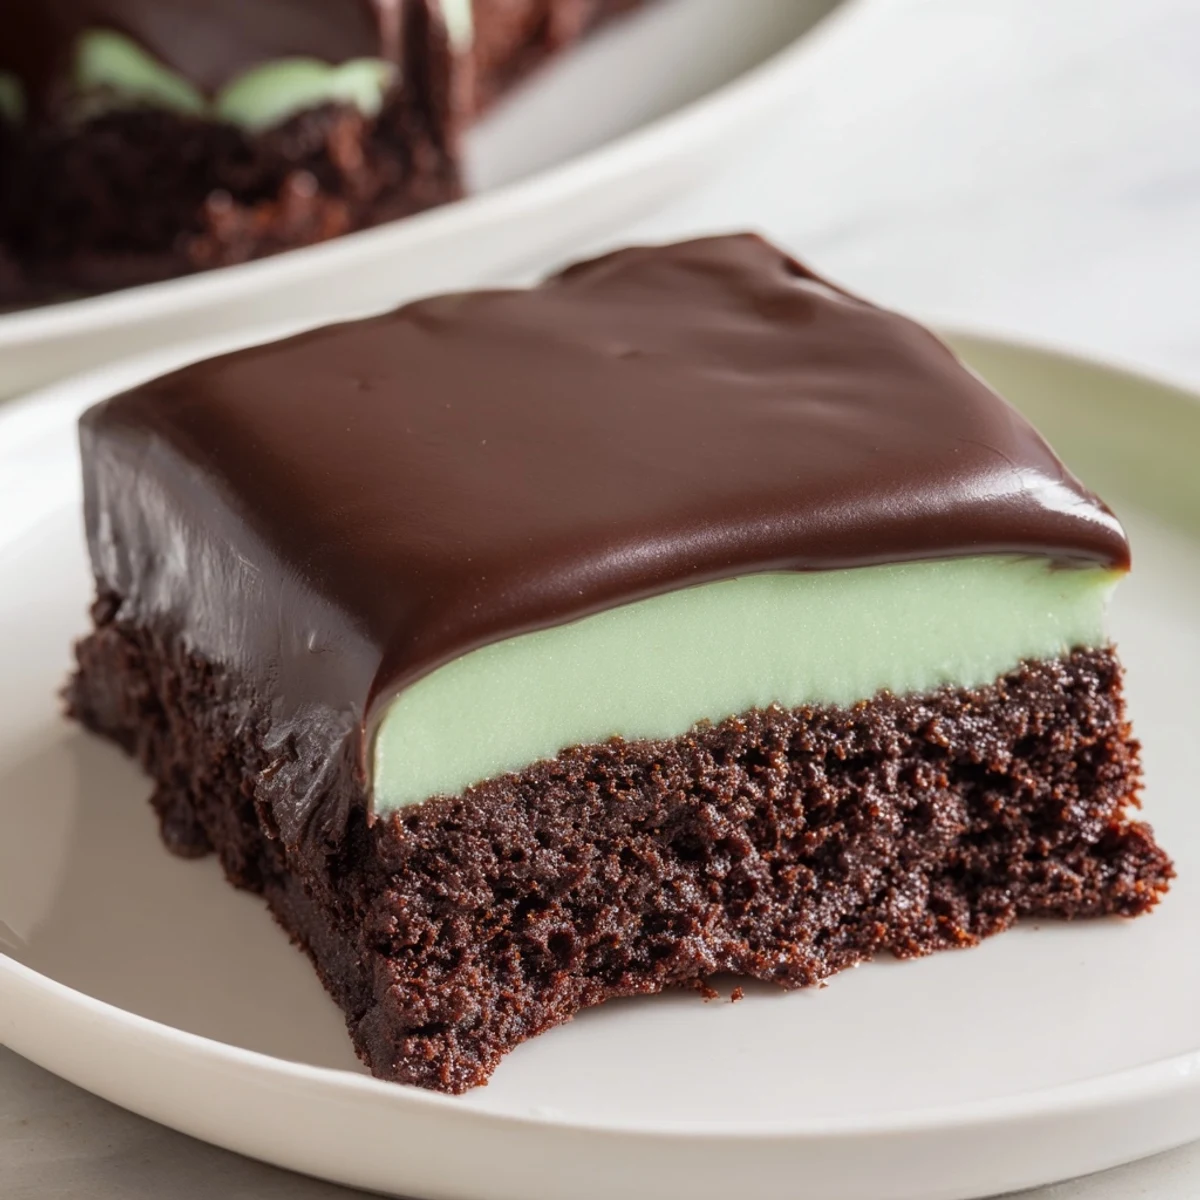
 These shamrock mint brownies combine a rich, fudgy chocolate base with a creamy, cool mint layer, topped by a smooth, glossy chocolate ganache. The method involves melting chocolate with butter for a smooth batter, folding in cocoa and flour gently, then baking to perfection. The mint layer blends butter, powdered sugar, milk, peppermint extract, and a hint of green coloring, chilled before adding a decadent ganache made from chocolate and cream. Ideal for celebrations or satisfying a sweet craving with a refreshing mint twist.
The first time I made these mint brownies was actually by accident. I had intended to make regular brownies for a friend's birthday, but she mentioned offhandedly how much she loved the combination of chocolate and mint. I'd never attempted a layered brownie before, and honestly, I was nervous about messing up the timing between cooling the base and adding the mint cream. But when I pulled that chilled pan out of the fridge and sliced through the glossy chocolate ganache, revealing that bright green mint layer underneath, I knew I had stumbled onto something special.
Last March, my roommate caught me hovering over the cooling brownie pan with a fork, claiming I was just checking the temperature. She laughed and called me out on my third sample of the afternoon. There's something about the way the cool mint hits the back of your throat right after that rich chocolate that makes it impossible to stop at just one square.
Ingredients
- Unsalted butter: I use butter straight from the fridge for the brownie base but let it soften completely for the mint layer, temperature makes a huge difference in texture
- Semi sweet chocolate: Chop it yourself rather than using chips, chips contain stabilizers that prevent proper melting
- Granulated sugar: The sugar creates that crackly, shiny top on brownies when properly creamed with the eggs
- Large eggs: Room temperature eggs incorporate better and help achieve that perfect fudgy crumb
- Vanilla extract: Pure vanilla enhances the chocolate without competing with the mint
- All purpose flour: Measure by spooning into the cup and leveling off, too much flour makes brownies cakey instead of fudgy
- Unsweetened cocoa powder: Dutch process cocoa gives a deeper, smoother chocolate flavor
- Salt: A small amount balances the sweetness and intensifies the chocolate
- Peppermint extract: Start with half teaspoon and taste, you can always add more but you cannot take it back
- Green food coloring: Gel coloring works better than liquid, adding less moisture to the frosting
- Heavy cream: Room temperature cream incorporates more smoothly into the ganache
Instructions
- Prepare the pan and heat the oven:
- Line your square baking pan with parchment paper, letting the paper hang over two opposite sides. This creates handles that make lifting the brownies out effortless later.
- Melt the chocolate base:
- Keep the heat low and stir constantly, chocolate can seize and turn grainy if it gets too hot. The mixture should be glossy and smooth like warmed pudding.
- Build the batter structure:
- Whisking sugar into the warm chocolate creates a glossy base, then add eggs one at a time, each addition makes the mixture shinier and more emulsified.
- Fold in the dry ingredients:
- Sift together the flour, cocoa, and salt before adding, this prevents lumps and overmixing which develops too much gluten.
- Bake to perfect fudginess:
- The toothpick test is tricky here, you want moist crumbs attached, not completely clean. Overbaked brownies lose that fudgy texture we are after.
- Prepare the mint cream:
- Beat the butter alone first until it is pale and fluffy, this aerates the frosting so it is not dense or greasy on the tongue.
- Add color and mint flavor:
- Add food coloring drop by drop, the color deepens as it sits. Whip until the frosting is light enough to spread but firm enough to hold its shape.
- Layer and chill:
- Use an offset spatula to spread the mint cream evenly, starting from the center and working outward. This chilling step is nonnegotiable, the ganache will not set properly on a warm mint layer.
- Make the ganache:
- Pour the hot cream over the chopped chocolate and let it sit untouched, this gives the chocolate time to soften before stirring.
- Finish and set:
- Pour slowly in one corner and let the ganache find its own level, tilting the pan gently if needed to reach the edges. The final chill creates those clean, sharp cuts when you are ready to serve.
 Save to Pinterest
 My sister requested these for her wedding shower instead of a traditional cake, which I thought was ambitious for home baking. Watching guests discover that mint layer for the first time, seeing their eyes widen in surprise, made every minute of cooling and chilling absolutely worth it.
Making These Ahead
You can prepare the brownie base and mint layer up to two days in advance, just wrap the pan tightly and keep refrigerated. Add the ganache the day you plan to serve, as it can develop condensation spots if it sits too long. I have found these actually taste better on day two, when the flavors have had time to mingle and the mint has mellowed slightly.
Getting Clean Slices
The secret to those perfect bakery style squares is a hot, dry knife. Dip your knife in hot water and wipe it completely dry between every single cut. This sounds tedious but it is what keeps the ganache from smearing and the mint layer from pulling up with the chocolate. I also trim about a quarter inch off each edge before cutting into serving squares, which makes every piece look pristine.
Serving Suggestions
These brownies are rich enough to stand alone but they become something else entirely when paired thoughtfully. I have found that the contrast of temperature matters as much as flavor pairing. A cold brownie with something warm and coffee based creates this moment where the chocolate seems to bloom on your tongue.
- Serve slightly chilled with hot Irish coffee, the cream complements both the mint and chocolate
- A splash of peppermint schnapps in the ganache takes these to adult only status
- Dust the tops with crushed candy canes in winter for extra color and crunch
 Save to Pinterest
 These have become my go to for St. Patricks Day, but honestly, they have earned a permanent spot in my baking rotation. There is something about that first bite, the way the cool mint cuts through all that rich chocolate, that makes people pause and really savor what they are eating.