 Save to Pinterest
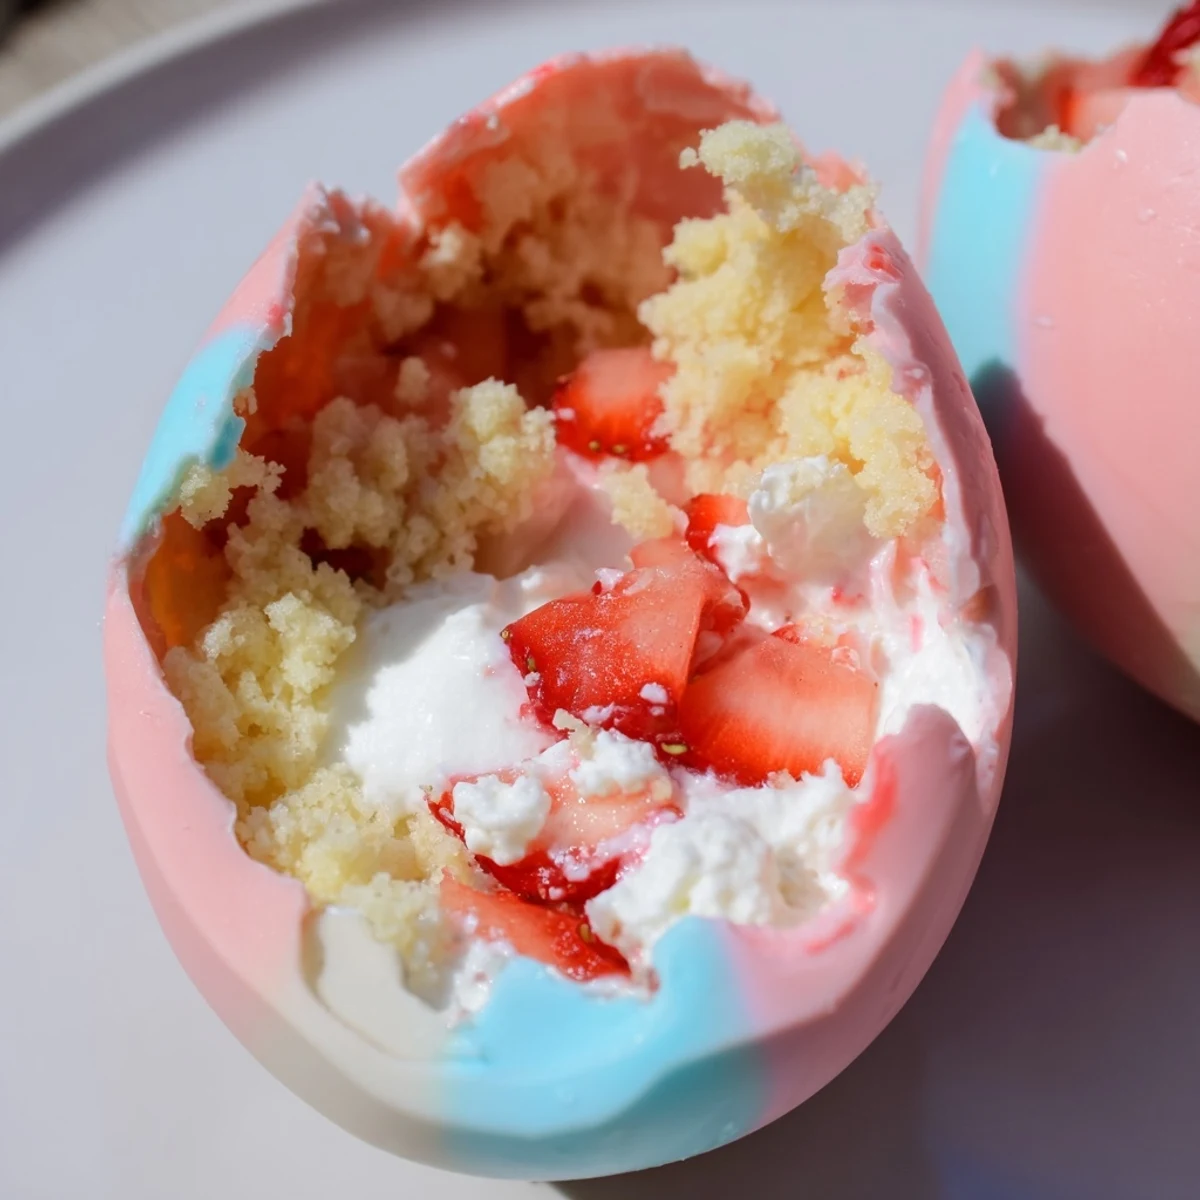
 These festive egg-shaped treats transform classic strawberry shortcake into bite-sized holiday delights. Fluffy homemade shortcake gets crumbled and layered with sweet macerated strawberries and freshly whipped cream, all enclosed in smooth white chocolate shells. The pastel-colored chocolate egg halves create a stunning presentation for Easter brunches and spring celebrations.
Each element is prepared separately - bake golden shortcake rounds, macerate fresh berries in sugar and lemon, whip cream to stiff peaks, and coat silicone egg molds with melted white chocolate. Assembly involves layering the components and sealing the eggs by warming the chocolate edges. The result is a delightful combination of textures and flavors that looks impressive on any dessert table.
The first Easter I made these, my kitchen looked like a pastel explosion had gone off in the best possible way. White chocolate streaked the counters in soft pinks and mint greens, while strawberry juice stained everything it touched. My daughter walked in, took one look at the chaos, and declared it the most beautiful mess she'd ever seen. Sometimes the holidays are measured in sticky memories instead of perfection.
Last year I brought these to a neighborhood potluck and watched three different adults literally gasp when they bit into one. Something about the egg shape makes people feel like they're discovering a hidden treasure. Now every April, my neighbor Sarah starts texting me in all caps about when they're coming back. Food that creates this kind of anticipation is worth every minute of the process.
Ingredients
- 1 ½ cups all-purpose flour: The backbone of classic shortcake that soaks up all those fruit juices without getting soggy
- ⅓ cup granulated sugar: Just enough sweetness to balance the tangy strawberries and rich white chocolate
- 2 tsp baking powder: What makes the shortcake puff up into tender, flaky layers worth crumbling
- ¼ tsp salt: Don't skip this, it's what makes the butter flavor actually sing
- 6 tbsp cold unsalted butter, cubed: Keep it ice cold, seriously, the colder the butter the flakier the final crumb
- ½ cup heavy cream: Adds richness to the dough and helps bind everything into something cohesive
- 1 large egg: Structure and richness in one neat package
- 1 ½ cups fresh strawberries, diced: Pick the reddest ones you can find, they're the star of the show here
- 2 tbsp granulated sugar: Draws out those natural strawberry juices for maximum flavor impact
- 1 tsp lemon juice: Brightens everything up and keeps the strawberries tasting fresh, not cloying
- 1 cup heavy whipping cream: Whips into that clouds and dreams filling we all secretly want more of
- 2 tbsp powdered sugar: Sweetens and stabilizes the whipped cream so it holds its shape inside
- 1 tsp vanilla extract: The supporting actor that makes all the other flavors feel complete
- 12 oz white chocolate or candy melts: Real white chocolate gives better flavor, candy melts are easier to work with
- Pastel food coloring: Gel colors work best without seizing up the chocolate
Instructions
- Make the shortcake foundation:
- Preheat your oven to 375°F and line a baking sheet with parchment paper. Whisk together flour, sugar, baking powder, and salt in a large bowl until well combined.
- Cut in the butter:
- Add cold cubed butter and use a pastry cutter or your fingers until the mixture looks like coarse crumbs with some pea-sized pieces remaining. Those butter pockets create all the flaky texture.
- Bring the dough together:
- Whisk cream and egg in a small bowl, then pour into the flour mixture. Stir gently until just combined, some dry bits are perfectly fine and prevent tough dough.
- Shape and bake:
- Turn the dough onto a floured surface and pat it to ¾-inch thickness. Cut into small rounds with a 2-inch cutter and place on your prepared baking sheet.
- Bake until golden:
- Bake for 12 to 15 minutes until the tops are lightly golden and they smell like comfort. Cool completely, then break into small crumbs with your hands.
- Prepare the strawberries:
- Toss diced strawberries with sugar and lemon juice in a bowl. Let them sit for 15 minutes until they release all those gorgeous red juices.
- Whip the cream:
- Beat heavy cream with powdered sugar and vanilla until stiff peaks form. You should be able to turn the bowl upside down without anything moving.
- Melt and color the chocolate:
- Melt white chocolate in 30-second intervals, stirring between each. Divide and tint with pastel gel colors if you want those Easter egg vibes.
- Create the shells:
- Brush melted chocolate into silicone Easter egg molds, covering sides evenly. Chill for 10 minutes, add a second thicker coat, and chill again until completely firm.
- Unmold carefully:
- Gently peel back the silicone to release your chocolate egg halves. Work quickly since the warmth of your hands can start softening them.
- Layer the magic:
- Fill half the shells with shortcake crumbs, a spoonful of strawberries and their juice, then a generous dollop of whipped cream. Repeat layering if space allows.
- Seal them shut:
- Gently warm the rim of a second shell half and press onto the filled half. The chocolate melts slightly and fuses together creating that perfect egg shape.
- Finish and chill:
- Decorate with drizzled chocolate, sprinkles, or edible glitter if you're feeling fancy. Chill until ready to serve, at least 30 minutes.
 Save to Pinterest
 Last year my youngest insisted on making every egg a different color, and we ended up with this rainbow tray that looked like something from a storybook. Watching people choose their eggs like they were picking lucky charms became its own kind of holiday tradition. Sometimes the most memorable part of cooking is who you're sharing it with.
Making These Ahead
The shortcake crumbs freeze beautifully for up to a month, just thaw them at room temperature before using. Whipped cream is best made fresh, but you can macerate the strawberries a day ahead and keep them refrigerated. I've learned that chocolate shells can be made three days in advance if stored in an airtight container between layers of parchment paper.
Troubleshooting Chocolate
If your white chocolate gets too thick while working with it, add a teaspoon of vegetable oil to smooth it out again. Don't use water or butter, they'll make the chocolate seize into an unusable clumpy mess. Working in a cool room helps too, I once tried this on a hot summer day and watched my shells refuse to set properly.
Serving Suggestions
These Easter egg bombs shine brightest when served on a bed of edible Easter grass or nestled in a pretty basket lined with a cloth napkin. I like to set out small tongs so people can choose their own colors without touching everyone's dessert.
- Let them sit at room temperature for 10 minutes before serving
- Have extra whipped cream nearby for anyone who wants more
- Pair with a dry sparkling wine to cut through all that sweet richness
 Save to Pinterest
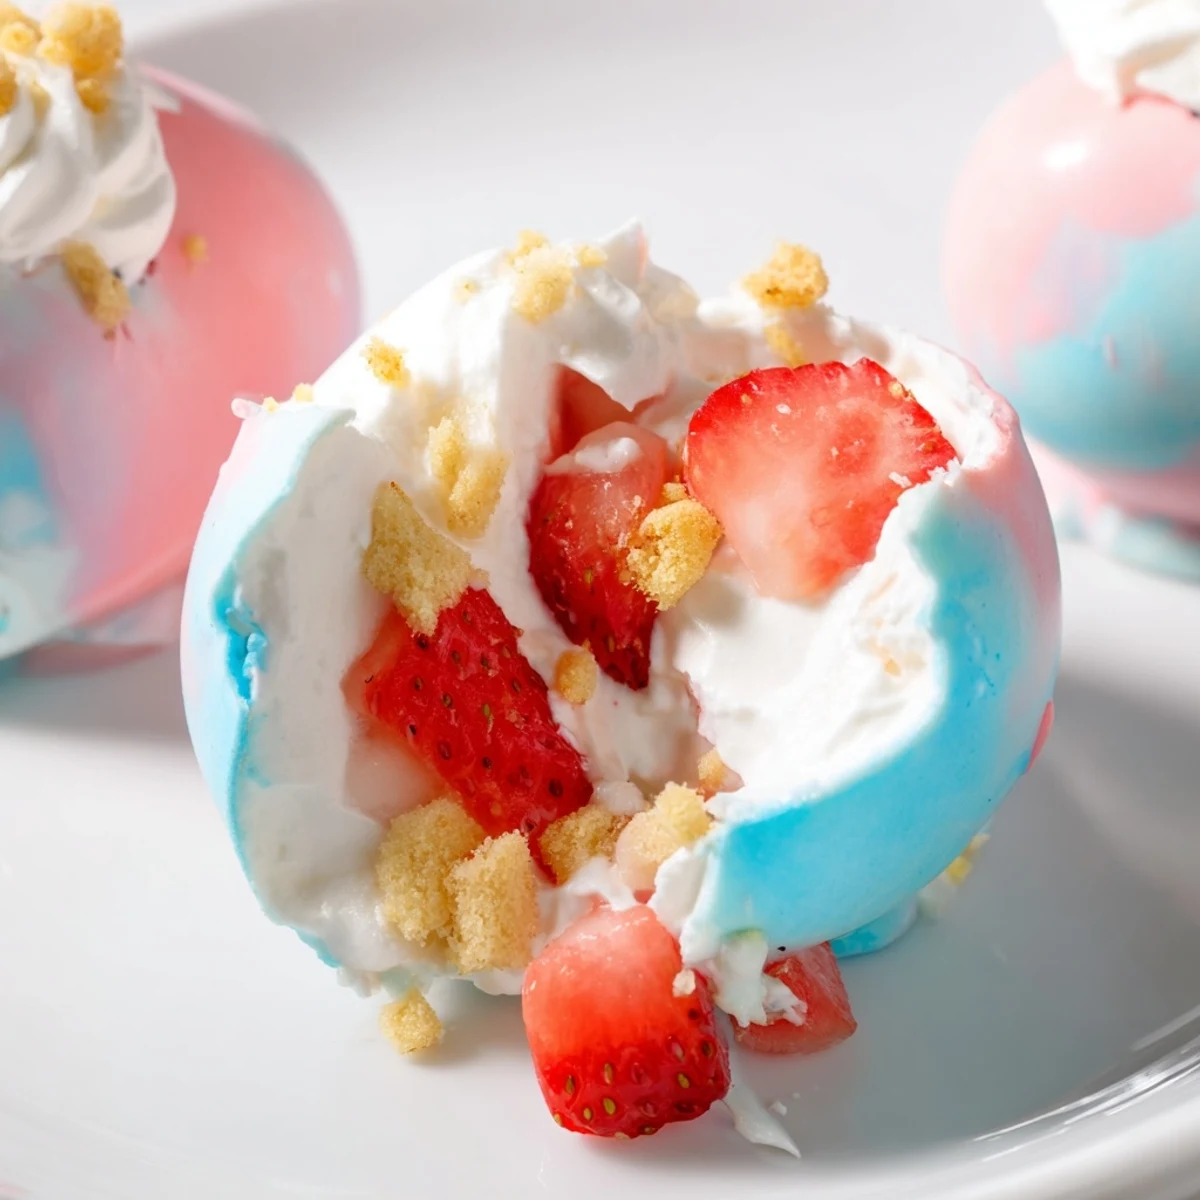
 There's something almost magical about breaking through that chocolate shell to discover the layers inside, like a little surprise you made yourself. Happy Easter, and may your kitchen be filled with more joy than dishes.
Recipe FAQs
- → How far in advance can I make these egg bombs?
-
Prepare components up to 24 hours ahead - store shortcake crumbs, macerated strawberries, and whipped cream separately in airtight containers. Assemble eggs within 4-6 hours of serving for optimal texture. The filled bombs hold up well refrigerated for up to 6 hours before the chocolate begins to soften from the moisture inside.
- → Can I use store-bought shortcake or pound cake instead?
-
Yes, store-bought shortcake, pound cake, or even ladyfingers work perfectly as time-saving alternatives. Cut into small cubes and lightly toast for extra texture. The homemade version offers lighter, more tender crumbs, but pre-made options still deliver delicious results when you're pressed for time.
- → What other fruits work well in these chocolate shells?
-
Raspberries, blueberries, or blackberries make excellent substitutes - follow the same macerating process with sugar and lemon juice. Peaches or mangoes work beautifully for summer variations. Just ensure any fruit is well-drained before filling to prevent the chocolate from softening too quickly.
- → Do I need special equipment for the chocolate shells?
-
Silicone Easter egg molds are essential for the egg shape - they're flexible enough to release the hardened chocolate without cracking. Look for food-grade silicone molds specifically designed for chocolate or candy making. A small pastry brush helps coat the molds evenly, though a spoon works if you don't have one.
- → How do I prevent the chocolate from cracking when sealing?
-
The key is warming the chocolate edges just enough to soften without melting completely. Use a kitchen torch briefly on the edges, or rub with a warm fingertip. Press the halves together firmly but gently and hold for 10-15 seconds. If cracks appear, brush with a little melted chocolate to patch and chill again.
- → Can these be frozen for later?
-
Freezing isn't recommended as the moisture from the strawberries and cream can cause the chocolate to seize and become grainy upon thawing. The texture and appearance will suffer. These treats are best enjoyed fresh within a day or two of assembly. If you must prepare ahead, keep components separate and assemble shortly before serving.